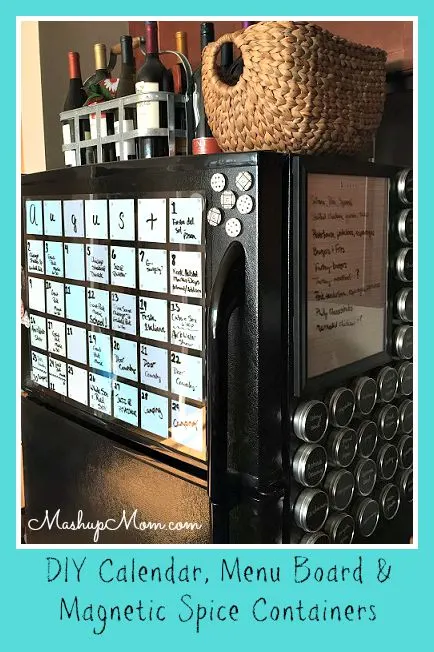
This week's Frugal Homemade feature is a DIY Dry Erase Calendar. I've seen variations on these on Pinterest over the years and thought it was finally time to give it a try!
Materials
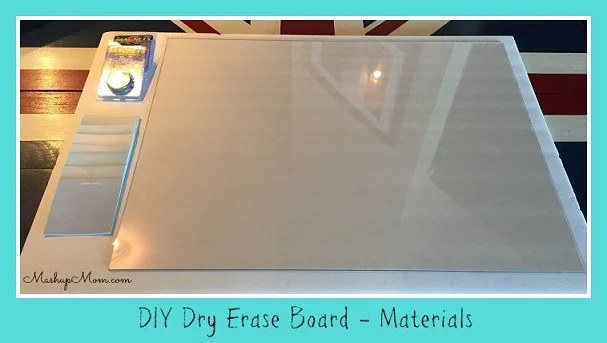
You will need:
- A sheet of Lexan -- I used an 18"x24" sheet from Home Depot, about $22.00. (Lexan is also called polycarbonate and is very similar to acrylic. Ask a sales associate where the acrylic sheets are, and you should find the Lexan in the same area. Acrylic is less expensive, but from my research Lexan is the best choice to avoid scratches for long term use.)
- 4 heavy duty 1" magnets -- also found at Home Depot, $1.68/2pk
- Paint chip samples in desired colors -- free
- Poster board
- Tape
- Glue -- both school glue and hot glue (or something like Gorilla Glue to attach the magnets)
- Dry erase pen
Directions
Let's get started!
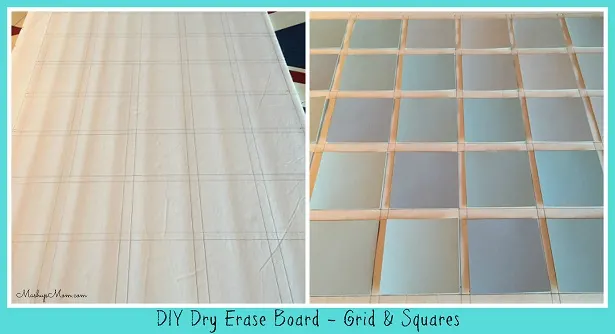
- Determine how big your squares need to be in order to fit calendar-style in your Lexan sheet. (I used thirty-five 3" squares.)
- Cut them to size out of your paint chips.
- Draw a 5x7 grid on the poster board to match the size of your squares. (You can use the Lexan sheet as a straight edge.)
- The spaces between my squares for an 18"x24" sheet of Lexan (using 3" squares) are ⅜" horizontal and ½" vertical.
- Place a paint chip square in each square of your grid and secure temporarily with Scotch tape.
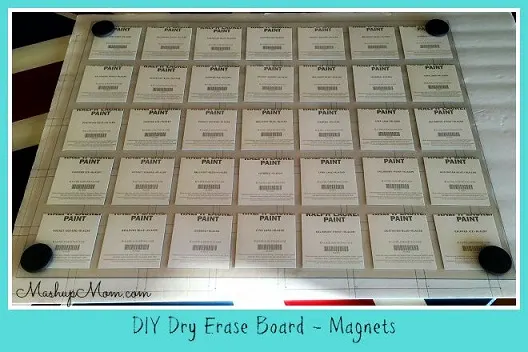
- Place a dot of school glue on each square.
- Carefully place the Lexan sheet over your squares, lining up the edges of the grid with the edges of your Lexan sheet.
- Once the glue is dry, carefully remove the poster board from the back.
- (Your finished calendar will be the sheet of Lexan with its attached paint sample squares!)
Then, just:
- Use hot glue or Gorilla glue to attach a magnet to each corner of the back of your Lexan sheet.
- Attach your finished Dry Erase calendar to your fridge with the magnets.
- Use your dry erase marker to fill in your plans for the month!
I think my refrigerator organization station is now complete!
- Want a similar station on your own fridge? Here are the earlier instructions to make your own DIY Menu Board and DIY Magnetic Spice Containers.


